Microsoft Laptop

  • Subscribe to our RSS feed.
  • Twitter
  • StumbleUpon
  • Reddit
  • Facebook
  • Digg

Tuesday, 30 June 2009

How To Clear Up your Disk on Windows Xp and Vista

Posted on 05:03 by Unknown
To Clean up your Disk it is actually very simple
There are only a few place where the junk gather
  1. Take a Look at C:\
  • You should only see the following 3 folders
  1. Documents and Settings
  2. Program Files
  3. WINDOWS
The rest is either
Driver files loaded by OEM
Lazy users who refuse to save it to their home directory respectively
Programs which do not install by default to Program Files Directory (and the installer did not bother to redirect the program there he/she just keep clicking NEXT NEXT NEXT FINISH)

They are all deletable except for the Programs which is better to reinstall via Control Panel into the correct Program Files directory to keep it neat

For Windows Xp you can clear up on the following folders
You may encounter file in use because the operating system is currently using the caches so it is locked
If you encounter this you can just skip that particular file
  • C:\WINDOWS\Temp
I need to elaborate on Prefetch
Prefetch is a place where the system cache certain programs so it can run faster
The official stand is that it is a self managing folder where rarely used program will get cleaned up automatically however you can still clear it up once it a while
After you clear up the system will need to prefetch again however there is no harm or any sort done
Also you will notice the system boots faster immediately after you clear Prefetch because Prefetch is loaded on boot so when it is cleared up it boots faster
  • C:\WINDOWS\Prefetch
Next Open (Delete everything inside)
  • C:\Documents and Settings\User\Local Settings\Temp
At the end of it there is already a tool to clean up your disk
It is called Disk Cleanup
It clears all the above mention folders except Prefetch.

The following is a disk cleanup script from mydigitallife for Windows Vista
@echo off
cls
TITLE Windows Vista System Junk Cleaner v1.0
echo.
echo Windows Vista System Junk Cleaner
echo Version 1.1
echo.
echo (C) 2007 My Digital Life (www.mydigitallife.info)
echo.
echo This batch script is provided as is without warranty.
pause
echo.
echo.
echo Start cleaning and deleting Vista system junk?
echo (Press Ctrl-C and answer Y to terminate)
pause
cls

del /f /s /q %systemdrive%\*.tmp
del /f /s /q %systemdrive%\*._mp
del /f /s /q %systemdrive%\*.log
del /f /s /q %systemdrive%\*.gid
del /f /s /q %systemdrive%\*.chk
del /f /s /q %systemdrive%\*.old
del /f /s /q "%appdata%\Microsoft\Windows\cookies\*.*"
del /f /s /q "%userprofile%\Local Settings\Temporary Internet Files\*.*"
del /f /s /q "%userprofile%\Local Settings\Temp\*.*"
del /f /s /q "%appdata%\Microsoft\Windows\Recent\*.*"
del /f /s /q %windir%\*.bak
del /f /s /q %windir%\prefetch\*.*
del /f /s /q %windir%\SoftwareDistribution\Download\*.*
rd /s /q "%userprofile%\Local Settings\Temp\" & md "%userprofile%\Local Settings\Temp\"
rd /s /q %windir%\Temp & md %windir%\Temp

cls
echo.
echo Windows Vista System Junk Cleaner
echo Version 1.1
echo.
echo (C) 2007 My Digital Life (www.mydigitallife.info)
echo.
echo This batch script is provided as is without warranty.
echo.
echo.
echo Vista system junk cleaning and deleting completed.
echo.
echo Press any key to exit.
pause
Just copy the script onto notepad, save as diskcleanup.bat.
Run with admin permission.
As you can see the script is completely clean.
Read More
Posted in cleanup, disk, optimize | No comments

Sunday, 28 June 2009

Crazy Stuff I Did To Lower The Temperature Of The Laptop

Posted on 10:23 by Unknown
Here is the deal:
You have encounter high temperatures especially during gaming.
You contacted the Repair Centre.
They told you to update the BIOS (usually the fix include making the fan spin more often).
You have sent the laptop back and forth until you have given up.

Finally the warranty run out and you can only depend on yourself.

Below are the following mods you can do.


For me I did the following:

Note: Most steps require dismantling of the system it will help with expert supervision and googling and down loading of service manual to dismantle it.

  • Throw away the thermal pad on the GPU and use Arctic Silver 5 instead
  • Remove the original CPU thermal paste and use Arctic Silver 5 instead.
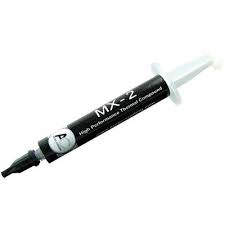
Arctic Cooling MX-2
Arctic Silver 5

  • Remove and throw away the "air filter" below the Laptop bottom cover to allow better air flow (I decided to do this after realizing this is the only part you can feel that air actually goes into the laptop, hence obstructing it restricts air flow hence remove it)
  • Sand the surface of heatsink which comes into contact with the GPU or CPU chip, using FINE SILICON CARBIDE PAPER
  • Sharpen the edges of the air vent casing (I got this inspiration by observing other Acer Aspire Laptop (Aspire 4935G) models, I noticed their vent size is gigantic compared to the vent size of this particular model hence it could be one of the gaming overheating factors. The new Acer Aspire 4736ZG Series Air Vents actually have even bigger holes than 4935G!)
Original (Top view)

Modified (Shave the vent corners)(Top view)

Actually the best cutting should be a wing shape pointing into the chassis.
The smaller the air drag the better.


Wikipedia

Not sure how much of this helps
But now my gaming temperatures fall below 90 degrees (around 85) and my idle temperature falls below 60 degrees (around 55) for the GPU.

Check out my recently modded laptop thermal exhaust:

Compare it to your original Aspire 4530 exhaust spot any difference?
Originally it has 16 dividers I cut out 8 of them so it looks like this.

5) I added Aluminium tape to bridge the laptop bottom chassis which is made out of metal to the heatsink.


Aluminium Tape

How I did it.

I rolled and flatten out one piece of Aluminium Tape to thicken it made sure it stucked in between the two interface without falling off (but not too tight).
Then I stick a tape over the heatsink and the chassis for better conduction.
The lowest temperature is now under 55 degrees hence it pretty much works.

6) UnderVolt the AMD Processor

7) Set the Graphics Mode to performance.

Read More
Posted in aspire 4530, optimize, temperature | No comments

Saturday, 27 June 2009

Harddisk Temperature on Aspire 4530

Posted on 01:47 by Unknown

HWMonitor currently does not detect Harddisk Temperature.
However HWiNFO32 does.
Here is a screenshot.


Read More
Posted in acer, aspire 4530, disk, temperature | No comments

Saturday, 13 June 2009

Tweak Firefox to return search in URL Bar

Posted on 06:14 by Unknown

Tweak Firefox URL Bar to return search results

Most modern web browser such as Firefox, Google Chrome, Safari and Internet Explorer (IE) is able to handle invalid URL or link location that user to type into address bar or location bar. The most typical option is automatically treat input as a query string or term, and search for it using default search engine.

Firefox takes “auto-correction” feature in address location bar a step further by automatically redirect user to a web page that it assumes user is looking for, much like Google’s “I am feeling lucky” feature. In fact, Firefox is using Google search engine to find possibly related or matching website and then direct Firefox to open the lucky first link returned by the Google.

For user who prefer to see a list of matching websites or search results instead of auto redirect to a web page when entering keywords in the Firefox’s link location bar, it’s possible to change the Firefox behavior by modifying its configuration using steps below.

  1. Run Firefox.
  2. Enter about:config into the address bar.
  3. Locate keyword.url or type keyword.url into “Filter” text box to search for it.
  4. Double click on the line of “keyword.url”.
  5. By default, the string value for “keyword.url” is “about:neterror?e=query&u=”. To display search results instead, replace the string with one of the following search statements, depending on the search engine you prefer:

    Google: http://www.google.com/search?q=
    Yahoo!: http://search.yahoo.com/search?p=
    Windows Live Search: http://search.live.com/results.aspx?q=

    Change Firefox Add Bar Search URL

  6. Click OK when done.

To revert to existing behavior where best matching site will be shown immediately on any typo error or keywords and terms been entered, just set the “keyword.url” value back to “about:neterror?e=query&u=” (without quotes).

Source:http://www.mydigitallife.info/2009/06/12/hack-to-modify-firefox-3-address-bar-to-return-search-results-when-query-or-invalid-url-is-entered/

Read More
Posted in firefox, optimize, tweak | No comments

Wednesday, 10 June 2009

OverClocking Nvidia Graphics

Posted on 09:35 by Unknown

For you guys who own Nvidia Graphics on PC or Laptop
EVGA Precision is a great Overclocking utility.
I don't really overclock my Nvidia 9100M G as it is a bad idea to overclock lousy GPUs.
You may end up destroying it over a measly few frames per second.
This tool's friendly interface doesn't need introduction.
Word of Warning:
Do not happily push the bars and press apply without thinking,especially the memory clock bar.
I am not responsible for the destruction of your GFX.

Read More
Posted in graphics, nvidia, overclock | No comments

Sunday, 7 June 2009

UnderVolting AMD Griffin Processor

Posted on 04:04 by Unknown

Edit:
You can read continue to read this as a guide but this is a better tool IMHO.

I chanced upon this site : http://amd.goexchange.de/

This is a new Tool designed to undervolt AMD Griffin ZM/RM/QL/SI Processors.
The program is free for home users (However you are encouraged to donate as it is a lot of work) and it is not free for business users


1)Why Undervolt?
In short conserve power (Battery Life) and reduce thermal emission (Overheating) with no effect on Computing Performance for more info check on the previous link.

2)For Intel Processors and AMD TL and older Series Mobile Processors RMClock is able to overclock them.

However no tool was available to underclock CPU until this tool was release.

How to use?

The documentation on the site is very lengthy and rather confusing.
I was confused first time I read it.

A very simplified guide as follows:

1) Create a folder in Program Files.
eg. Create C:\Program Files\GriffinControl

2) Download the files required (scroll down a bit you should see 2 files each for 32bit and the other 2 files for 64bit) and extract them to the folder you created in 1).

3) Open the GriffinControl_config.xml with notepad (the author provided a skeleton configuration file) .

You will only be looking at the following column and the values in bold
Note QL/SI Processor only should have 2 pstate number (I think it is 0 and 1 , no 2 not sure about this).
How do you go about setting voltage?

Basically AMD ZM/RM Series Processors has 3 Power State.

A full state runs at max frequency when you need the processing power it throttles up to maximium frequency giving you the computation power you need.
This is pstate number 0 which is 100% of the total CPU Power.
pstate number 1 is 50% of the total CPU Power.
pstate number 2 is 25% of the total CPU Power.

If you set too low a voltage the CPU will not run stably due to unsufficient voltage and cause BSOD.

For QL/SI Processor you only have 2 pstate, 0 & 1.
pstate number 0 which is 100% of the total CPU Power.
pstate number 1 is 50% of the total CPU Power.

How do you know the default voltages for the CPU?
Either you run CPUZ as shown by the picture at the end of this entry.
Then use Vista Processor Power Management to throttle at different percentages to find the 3 or 2 voltage level depending on what processor you have.
If you are not sure you can leave a comment at the end of this entry I will recommend values for you to try.
Another way is to refer to the config file provided with the downloads.

4)Reference this table for the list of Voltage ID.
eg. The value 42 as shown above translate to 1.025V and so on.

(Note the lowest VID is 64 no lower values will work and value above 36 can fry your processor )

Edit the values to the voltage you want.

For my RM-72 Processor, I tested 64,52 and 42 is the most extreme stable values.
Which translate to: 0.750V, 0.900V and 1.025V respectively.
Original Voltage: 0.800, 0.950V and 1.075V respectively.
A difference of 0.05V, 0.05V,0.05V , any higher it BSODS

Change the values accordingly and save.

6)Run GriffinControlService_32bit.exe for 32bit Windows and GriffinControlService_64bit for 64bit Windows.
Follow instruction and create the Windows Service if you encounter an error message you did something wrong.
Go to Services Menu and Start the Service if you ever want to delete the service you must stop it first (using the same manner, stopping it instead of starting it)
If you are doing testing make sure the service is set to manual start instead of Automatic so after BSOD it will default to original value and not BSOD repeatedly I learned this the hard way.
If you did not listen to me and it BSOD repeatedly, when it is possible to get to Windows Either start with last saved configuration or try to switch to Power Saver Mode in Vista Power Plan so it will not cause BSOD again.Don't worry no physical damage is done to the processor.

7) Run a CPU stressing Tool like Intel Burn In make sure no BSOD happens when running the tool so the voltage is stable. Use the Vista Processor Power Management to test the different Power States.
Set to auto start service if you are happy with the final setting.

This program is very well created especially when the author implemented it as a windows service, so donate to the author if you are able to.

Special Thanks to the author, now my CPU Voltage Temperature Dropped by a lot at max frequency.

Proof that it works!

Edit: The Service hung on Vista and created a Windows Event Log (no error message) so I set it to Delay Start and the problem went away.

At the end of the process the result of undervolting implies AMD chips are indeed overworked in order to catch up to Intel Processor Performance, the undervolted amount of 0.05 at max frequency implies this.
Any further undervolting results in BSOD.

Just encountered another BSOD raise voltages by 0.025

Finally whenever you encounter a hardware BSOD (read the message on the BSOD) just raise the voltage by 0.025.
Eg. when you BSOD on youtube you probably need to raise p-state 1 and p-state 2 by 0.025
My guess is when the CPU changes state from 2 to 1 it switches too quickly therefore insufficient voltage to support the boost hence it BSOD.
Read More
Posted in amd, aspire 4530, download, optimize, tweak, undervolt | No comments

Friday, 5 June 2009

Nvidia PhysX Update

Posted on 10:02 by Unknown
NVIDIA PhysX System Software WHQL
Version:9.09.0428
Release Date:June 03, 2009
Operating System:Windows XP, Windows Vista, or Windows 7
Language:U.S. English
File Size:
39.2 MB

Download here
Read More
Posted in download, driver, nvidia | No comments
Newer Posts Older Posts Home
Subscribe to: Posts (Atom)

Popular Posts

  • Delete Windows System Files
    If you play around with Windows System Files sometimes it is not possible to delte them off after you had your fun. The following commands w...
  • Internet Explorer Tweak
    Here is a registry tweak for Internet Explorer Similar to the Mozilla Firefox tweak this enable you to increase the number simultaneous ser...
  • How to Mod your Laptop VGA BIOS
    Basically there are 2 locations where the VGA BIOS in laptops. Some OEMS embed the VGA BIOS in the EFI/BIOS in your laptops, other OEMs have...
  • Acer Phoenix BIOS Emergency Recovery
    This is for people who don't listen and interrupt the flashing BIOS for unknown reasons. This will work provided the BIOS BootBlock isn...
  • Secure Your Windows CD-Key (For Vista and 7)
    As you know everytime you activate a Windows Installation your Product Key can be retrieved via Software means. Don't believe me? Downl...
  • Changing the Acer Arcade Shortcut
    While surfing the Windows Registry (You must be thinking that I am weird =P) yesterday I found something interesting It is actually possible...
  • Some Interesting Modding Ideas
    I modded my Aspire 4530 AGAIN to control resultant temperature. Below are some ideas and pictures. Another mod idea This time a black anodi...
  • How to obtain the DSDT from your laptop
    There are many ways to rip the DSDT out of the laptop BIOS. If there is a BIOS editor it is possible to rip out the .AML file. However below...
  • Acer Aspire 4530 Boot Screen
    Acer Aspire 4530 Boot Dianogostic Screen PhoenixBIOS 4.0 Release 6.1 Copyright 1985-2008 Phoenix Technologies Ltd. All Rights Reserve 1.052....
  • List Of Modified BIOS Collection
    Here are the list of Modified BIOS Collection (mainly SLIC Mods), no warranty provided use at your own discretion! Acer Aspire 4520G BIOS Ac...

Categories

  • 32bit
  • 64bit
  • acer
  • ahci
  • amd
  • apple
  • aspire 4530
  • aspire 4535G
  • aspire 4740
  • atheros
  • atom
  • BIOS
  • boot
  • cleanup
  • configure
  • device
  • disk
  • dismantle
  • download
  • driver
  • fan control
  • firefox
  • firewall
  • firmware
  • fix
  • flash
  • graphics
  • hwmonitor
  • internet
  • linux
  • macs
  • microsoft
  • modified
  • nvidia
  • optimize
  • overclock
  • performance
  • power savings
  • powermizer
  • proxy
  • ram
  • Realtek
  • review
  • secure
  • shortcut
  • speaker
  • synaptics
  • temperature
  • theme
  • timeline
  • tweak
  • undervolt
  • update
  • wallpaper
  • windows 7
  • windows vista
  • Windows Xp
  • winsat
  • wlan

Blog Archive

  • ▼  2013 (10)
    • ▼  November (2)
      • A Simple How to use MiniDLNA on OpenWRT
      • OpenWRT TL-WDR3600/4300/4310 Release
    • ►  October (3)
    • ►  September (1)
    • ►  August (1)
    • ►  July (1)
    • ►  May (1)
    • ►  January (1)
  • ►  2012 (4)
    • ►  September (1)
    • ►  June (1)
    • ►  March (1)
    • ►  February (1)
  • ►  2011 (21)
    • ►  September (1)
    • ►  July (4)
    • ►  June (3)
    • ►  May (3)
    • ►  April (3)
    • ►  March (4)
    • ►  February (2)
    • ►  January (1)
  • ►  2010 (36)
    • ►  December (3)
    • ►  November (2)
    • ►  October (4)
    • ►  September (1)
    • ►  August (5)
    • ►  July (1)
    • ►  June (5)
    • ►  May (3)
    • ►  April (3)
    • ►  March (6)
    • ►  February (1)
    • ►  January (2)
  • ►  2009 (81)
    • ►  December (3)
    • ►  November (3)
    • ►  October (9)
    • ►  September (5)
    • ►  August (1)
    • ►  July (5)
    • ►  June (8)
    • ►  May (15)
    • ►  April (10)
    • ►  March (13)
    • ►  February (8)
    • ►  January (1)
  • ►  2008 (8)
    • ►  November (5)
    • ►  July (3)
Powered by Blogger.

About Me

Unknown
View my complete profile